Bumble Bear – Free Crochet Pattern
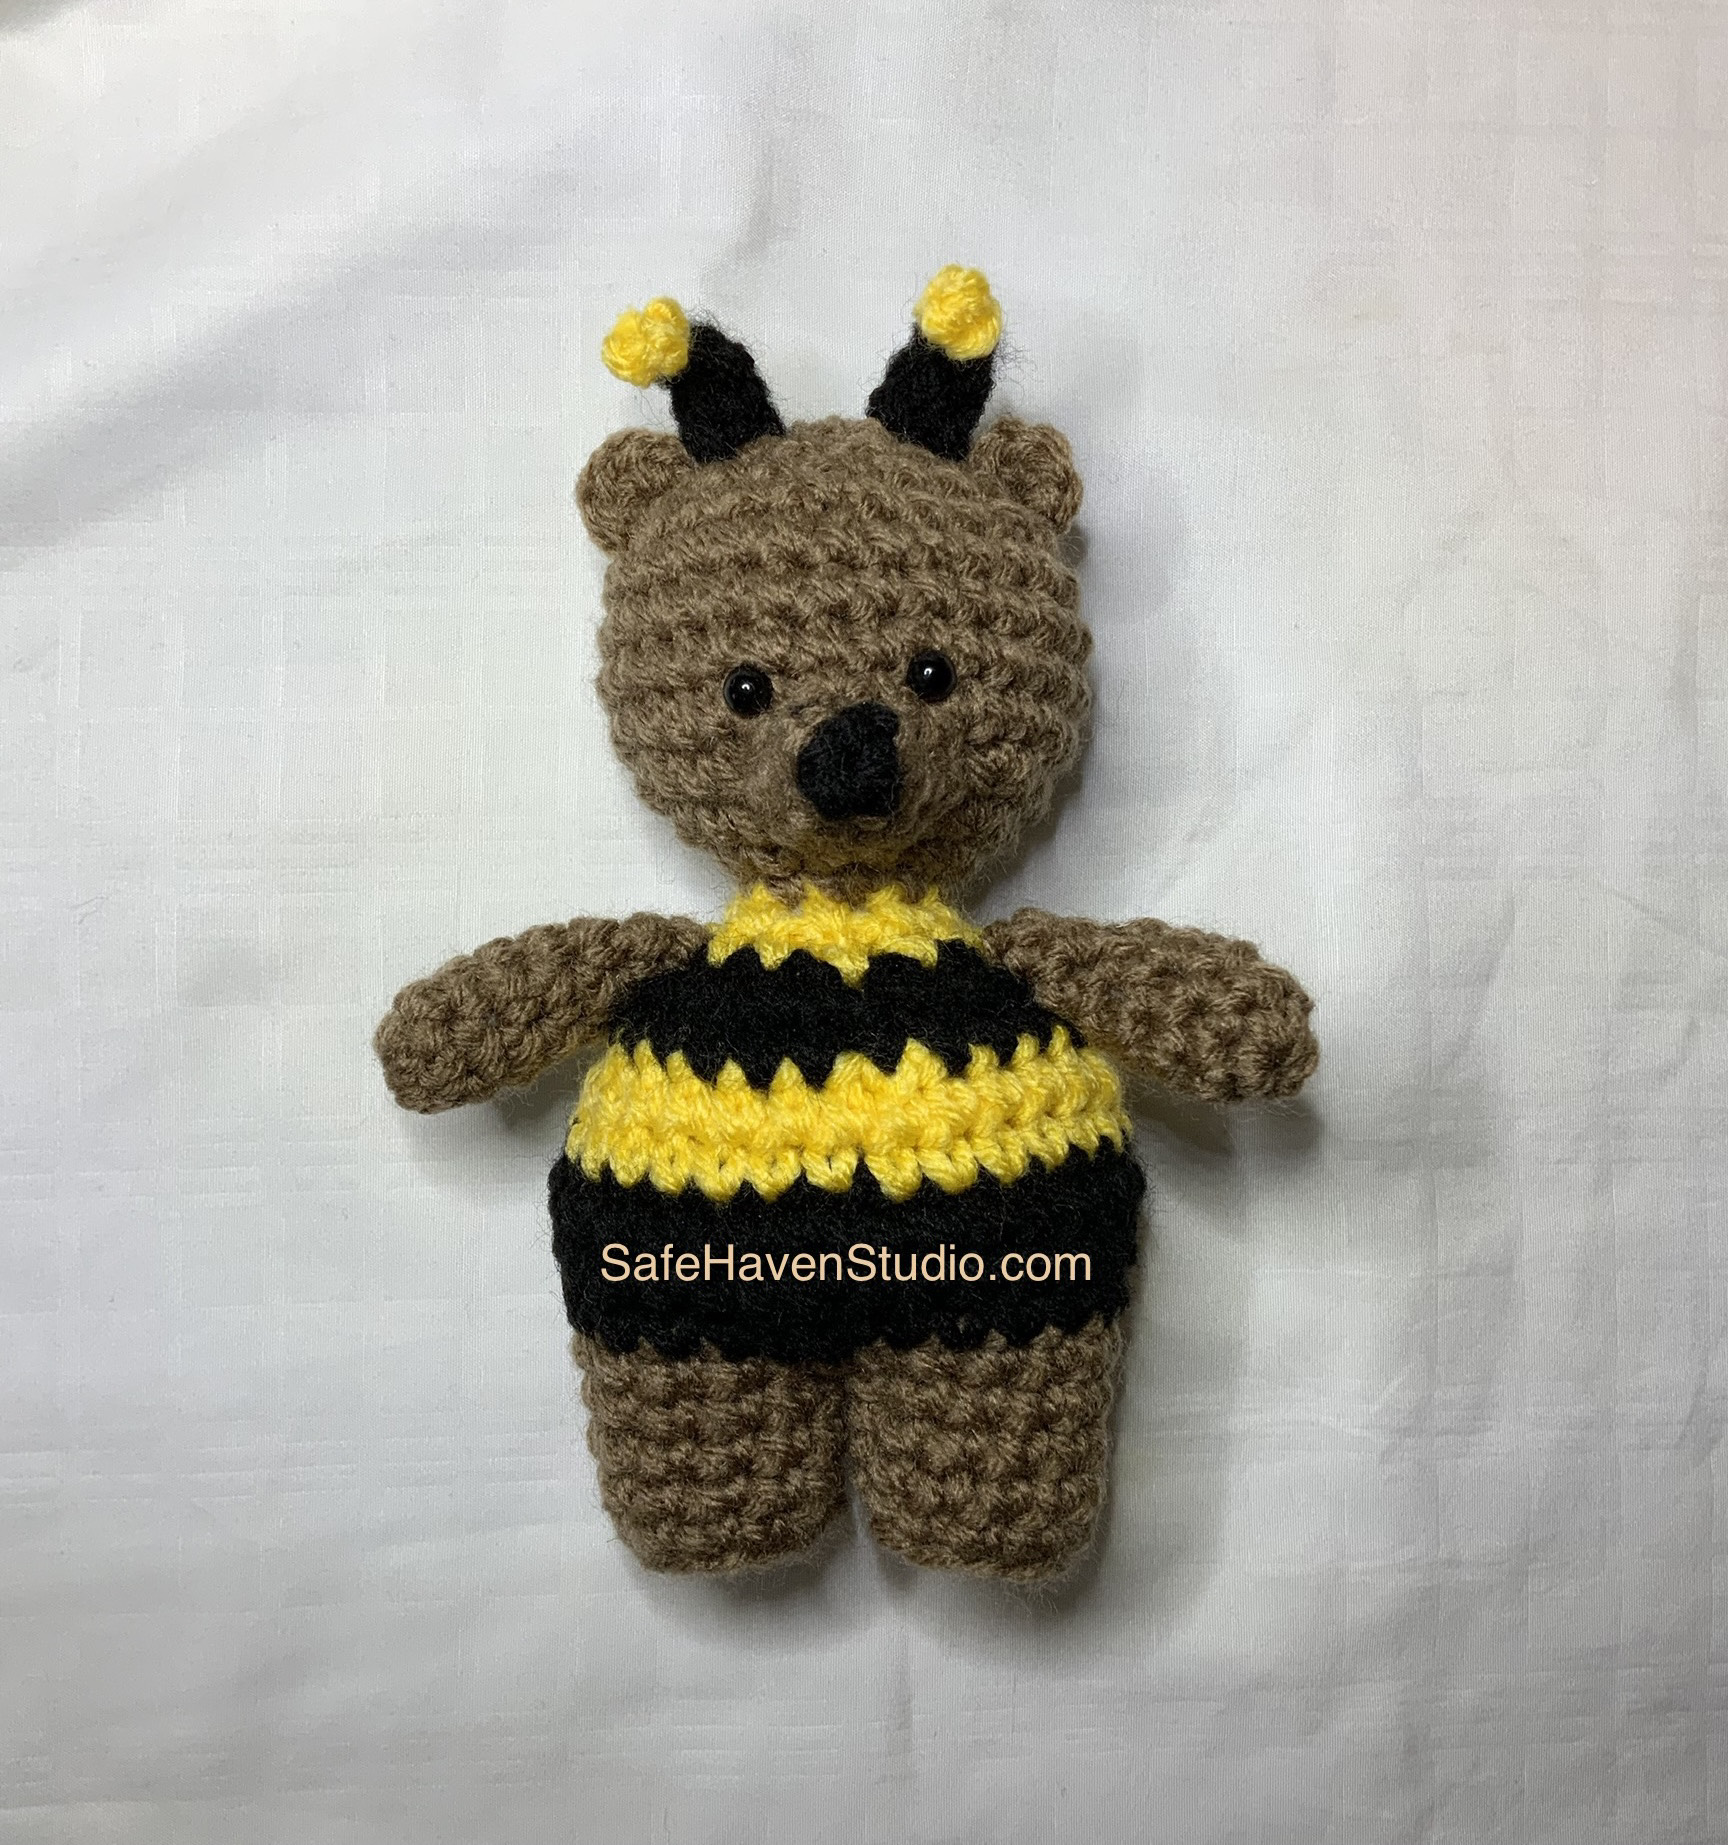
I feel like I’ve missed Spring already, at least here in the South! Little bumbles are around all through Summer though so I guess this is a multi-seasonal pattern. Bumble bees all year round wouldn’t bother me one bit. Please show me all the bumble bears you make on Instagram by tagging me at safehaven_studio
Materials Needed
- Worsted weight yarn in brown, yellow, black, and white
- 6mm safety eyes
- 3.75 (F) crochet hook
- stuffing
- yarn needle
- scissors
Crochet Terms (US Terms)
- Ch – Chain
- MR – Magic Ring
- Sc – Single Crochet
- Inc – Single Crochet Twice in the specified stitch
- Dec – Single Crochet Two stitches together
- BLO – Back Loop Only
- St – Stitch
- Sl St – Slip Stitch
Start with the Snout in the Color Black
R1: 3 Sc in MR
R2: *Inc* (6) – Change to brown
R3: 2 Sl St, Sc, 2 Inc, Sc (8)
R4: 2 Sl st, 2 Sc, 2 Inc, 2 Sc (10)
Sl St once, FO and leave a long tail for sewing.
Legs (2) In Brown
R1: 6 Sc in MR
R2: *Inc* (12)
R3: In BLO *Sc* (12)
R4-6: *Sc* (12)
FO first leg.
Make second leg following rows 1-6 again but DON’T Fasten Off and continue with Row 7.
Body (Continuation of the Legs)
R7: Make 12 Sc around the first leg, then make 12 Sc around second leg to join the legs together (24)
Move stitch marker to the last worked stitch. You might want to use a scrap piece of brown yarn to sew the hole closed between the legs if there is one.
Change to Black yarn.
R8: *5 Sc, Inc* (28)
R9: *6 Sc, Inc* (32)
R10: *Sc* (32)
Begin to stuff and continue as you go.
Change to yellow yarn.
R11: *6 Sc, Dec* (28)
R12: *Sc* (28)
Change to black yarn.
R13: *5 Sc, Dec* (24)
R14: *2 Sc, Dec* (18)
Change to yellow yarn.
R15: *Sc, Dec* (12)
R16: *2 Sc, Dec* (9)
Change to brown yarn for the head. FO yellow and black if you haven’t already. Do not FO brown. Continue with R17 of the head.
Head (In Brown)
R17: *2 Sc, Inc* (12)
R18: *Sc, Inc* (18)
R19: *2 Sc, Inc* (24)
R20: *3 Sc, Inc* (30)
R21-24: *Sc* (30)
R25: *3 Sc, Dec* (24)
Attach Snout to R19-21 and eyes between R21-22 right above the snout. The eyes should be about 3 sts apart. Make sure you’re stuffing the neck and head as you go.
R26: *2 Sc, Dec* (18)
R27: *Sc, Dec* (12)
R28: *Dec* (6)
FO and sew closed.
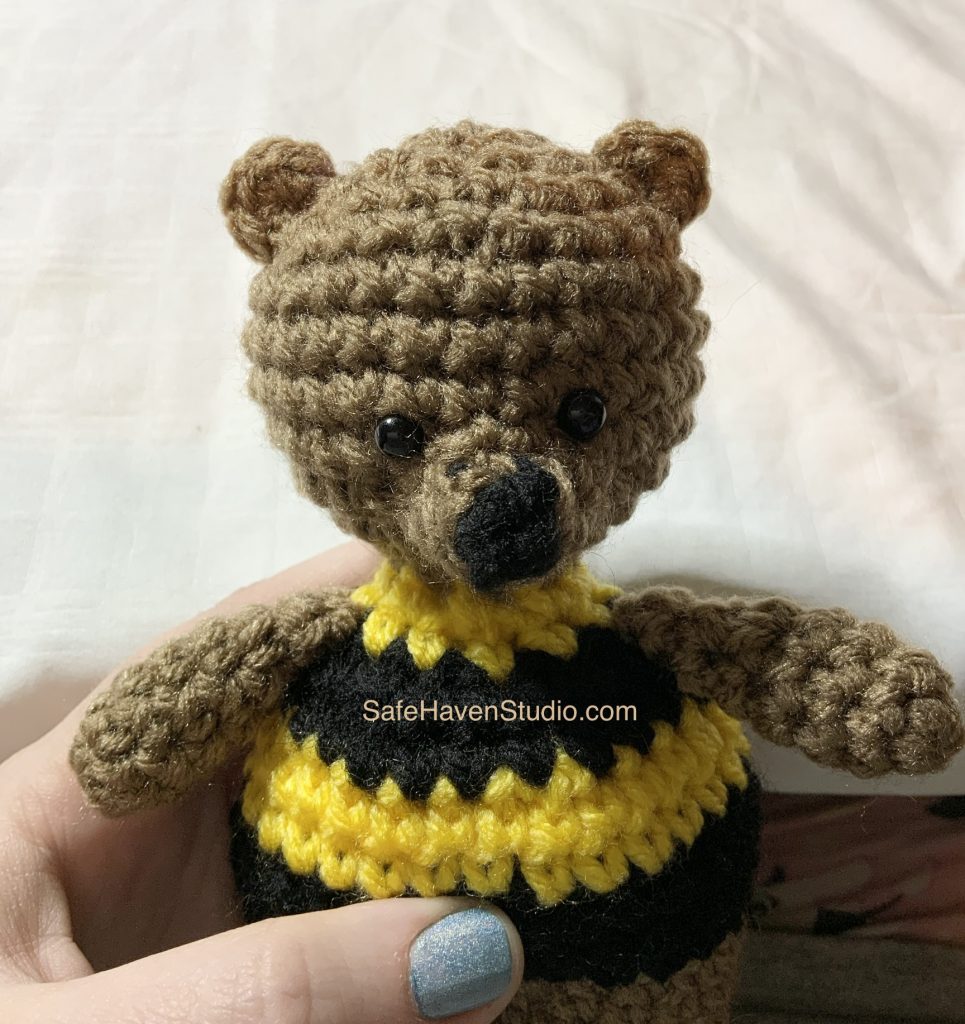
Ears in Brown (2)
R1: 4 Sc in MR. Pull tight into a half moon shape but don’t join.
Sew to R25-26 on the head.
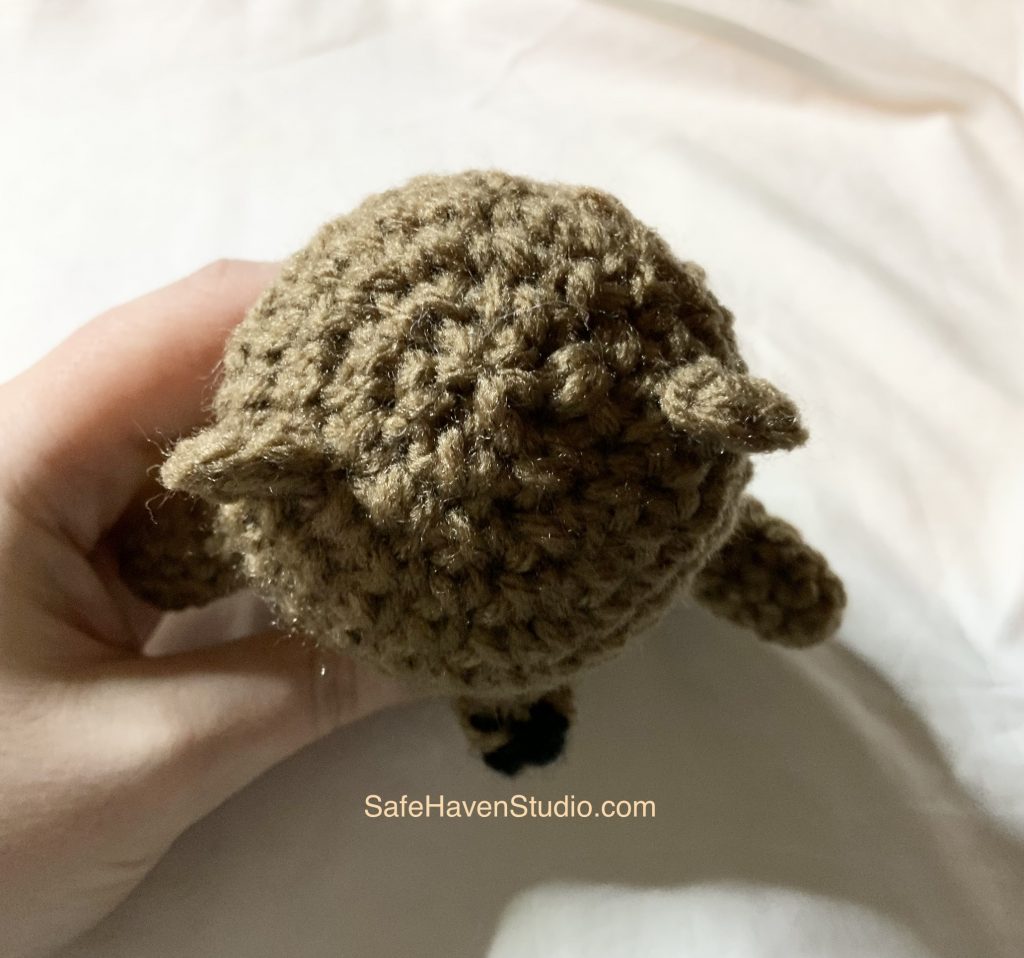
Arms in Brown (2)
R1: 6 Sc in MR
R2-7: *Sc* (6)
FO and leave a tail for sewing. Stuff lightly if you prefer.
Sew to R14 of the body in whatever position looks best to you.
Tail in Brown
R1: 4 Sc in MR
R2: *Inc* (8)
R3-4: *Sc* (8)
R5: Sl St once and Fo, leaving a long strand of yarn to sew.
Flatten the tail and sew across, closing R4.
Sew between R8-9 of the body.
Top of Antennae in Yellow
R1: 2 Sc in MR
FO and tie the beginning and end tails of yarn together but still leave some length.
Antennae Stalks in Black
R1: Ch 4
R2: Sc in 2nd Ch from hook and in the remaining 2 chains (3)
FO and leave a tail to sew.
Assembly of Antennae
Using the yellow tails that still remain on the tops of the antennae, sew them to the black stalks. Weave the yellow ends through the tops to secure as best as you can. FO the yellow.
Using the black tails left at the bottom of the stalks, sew to the head between the ears. Somewhere between R27-28 or whatever looks best to you.
Wings in White
R1: Ch 20 and Sl St into the first chain to make a circle.
Sl St in the 10th chain from the hook to separate the circle into 2 sides.
FO and leave a tail. Sew to R13 of the back.
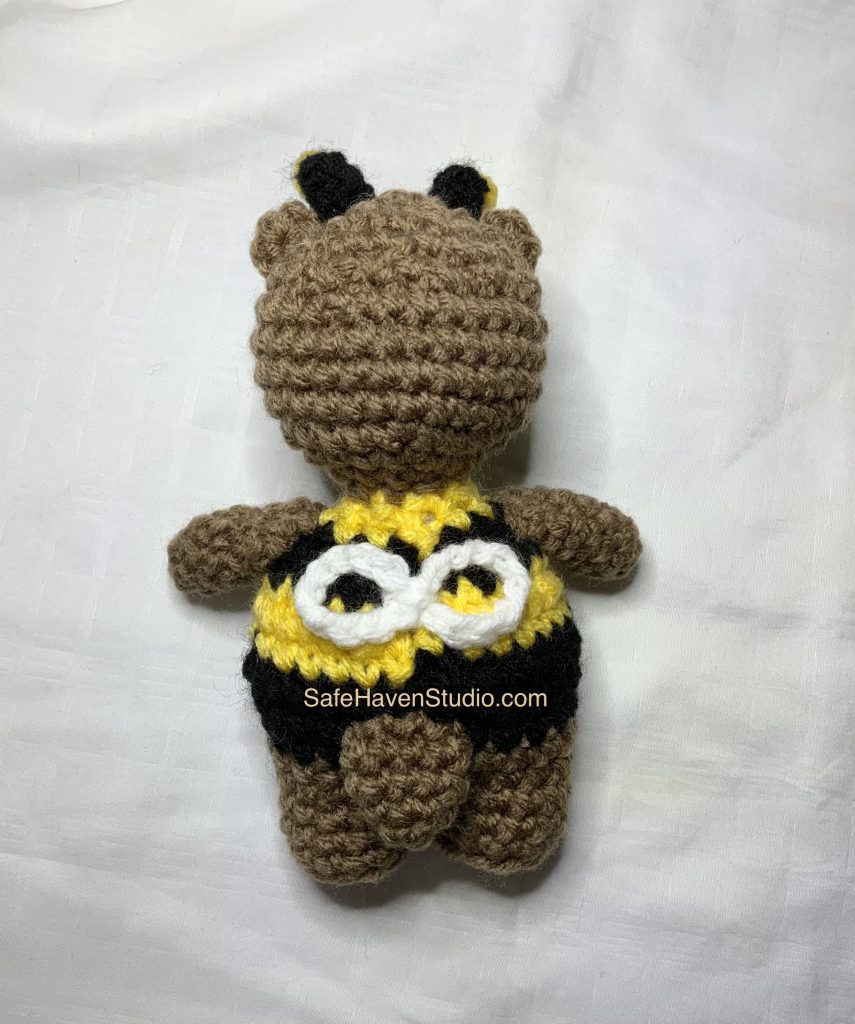
You’re Finished!
Thank you so much for viewing my pattern and I’d love to be tagged in your makes on Instagram!
Tag me @safehaven_studio
This is an original pattern by Shelby of SafeHavenStudio. You cannot claim this pattern or images as your own, distribute, or sell this pattern or images. If you want to share, you may link to this pattern but please do not reprint on your site. You may sell items made from this pattern in small quantities but please give credit to me (Shelby at SafeHavenStudio) for the pattern. Thank you for respecting the boundaries and products of designers.
