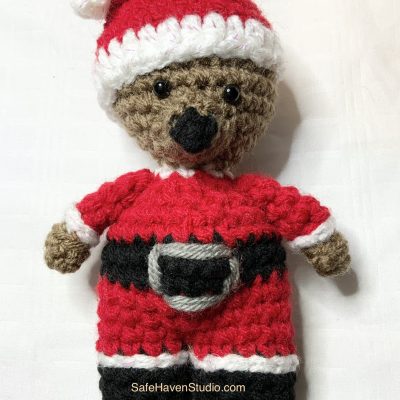
Santa Bear Ornament – Free Crochet Pattern
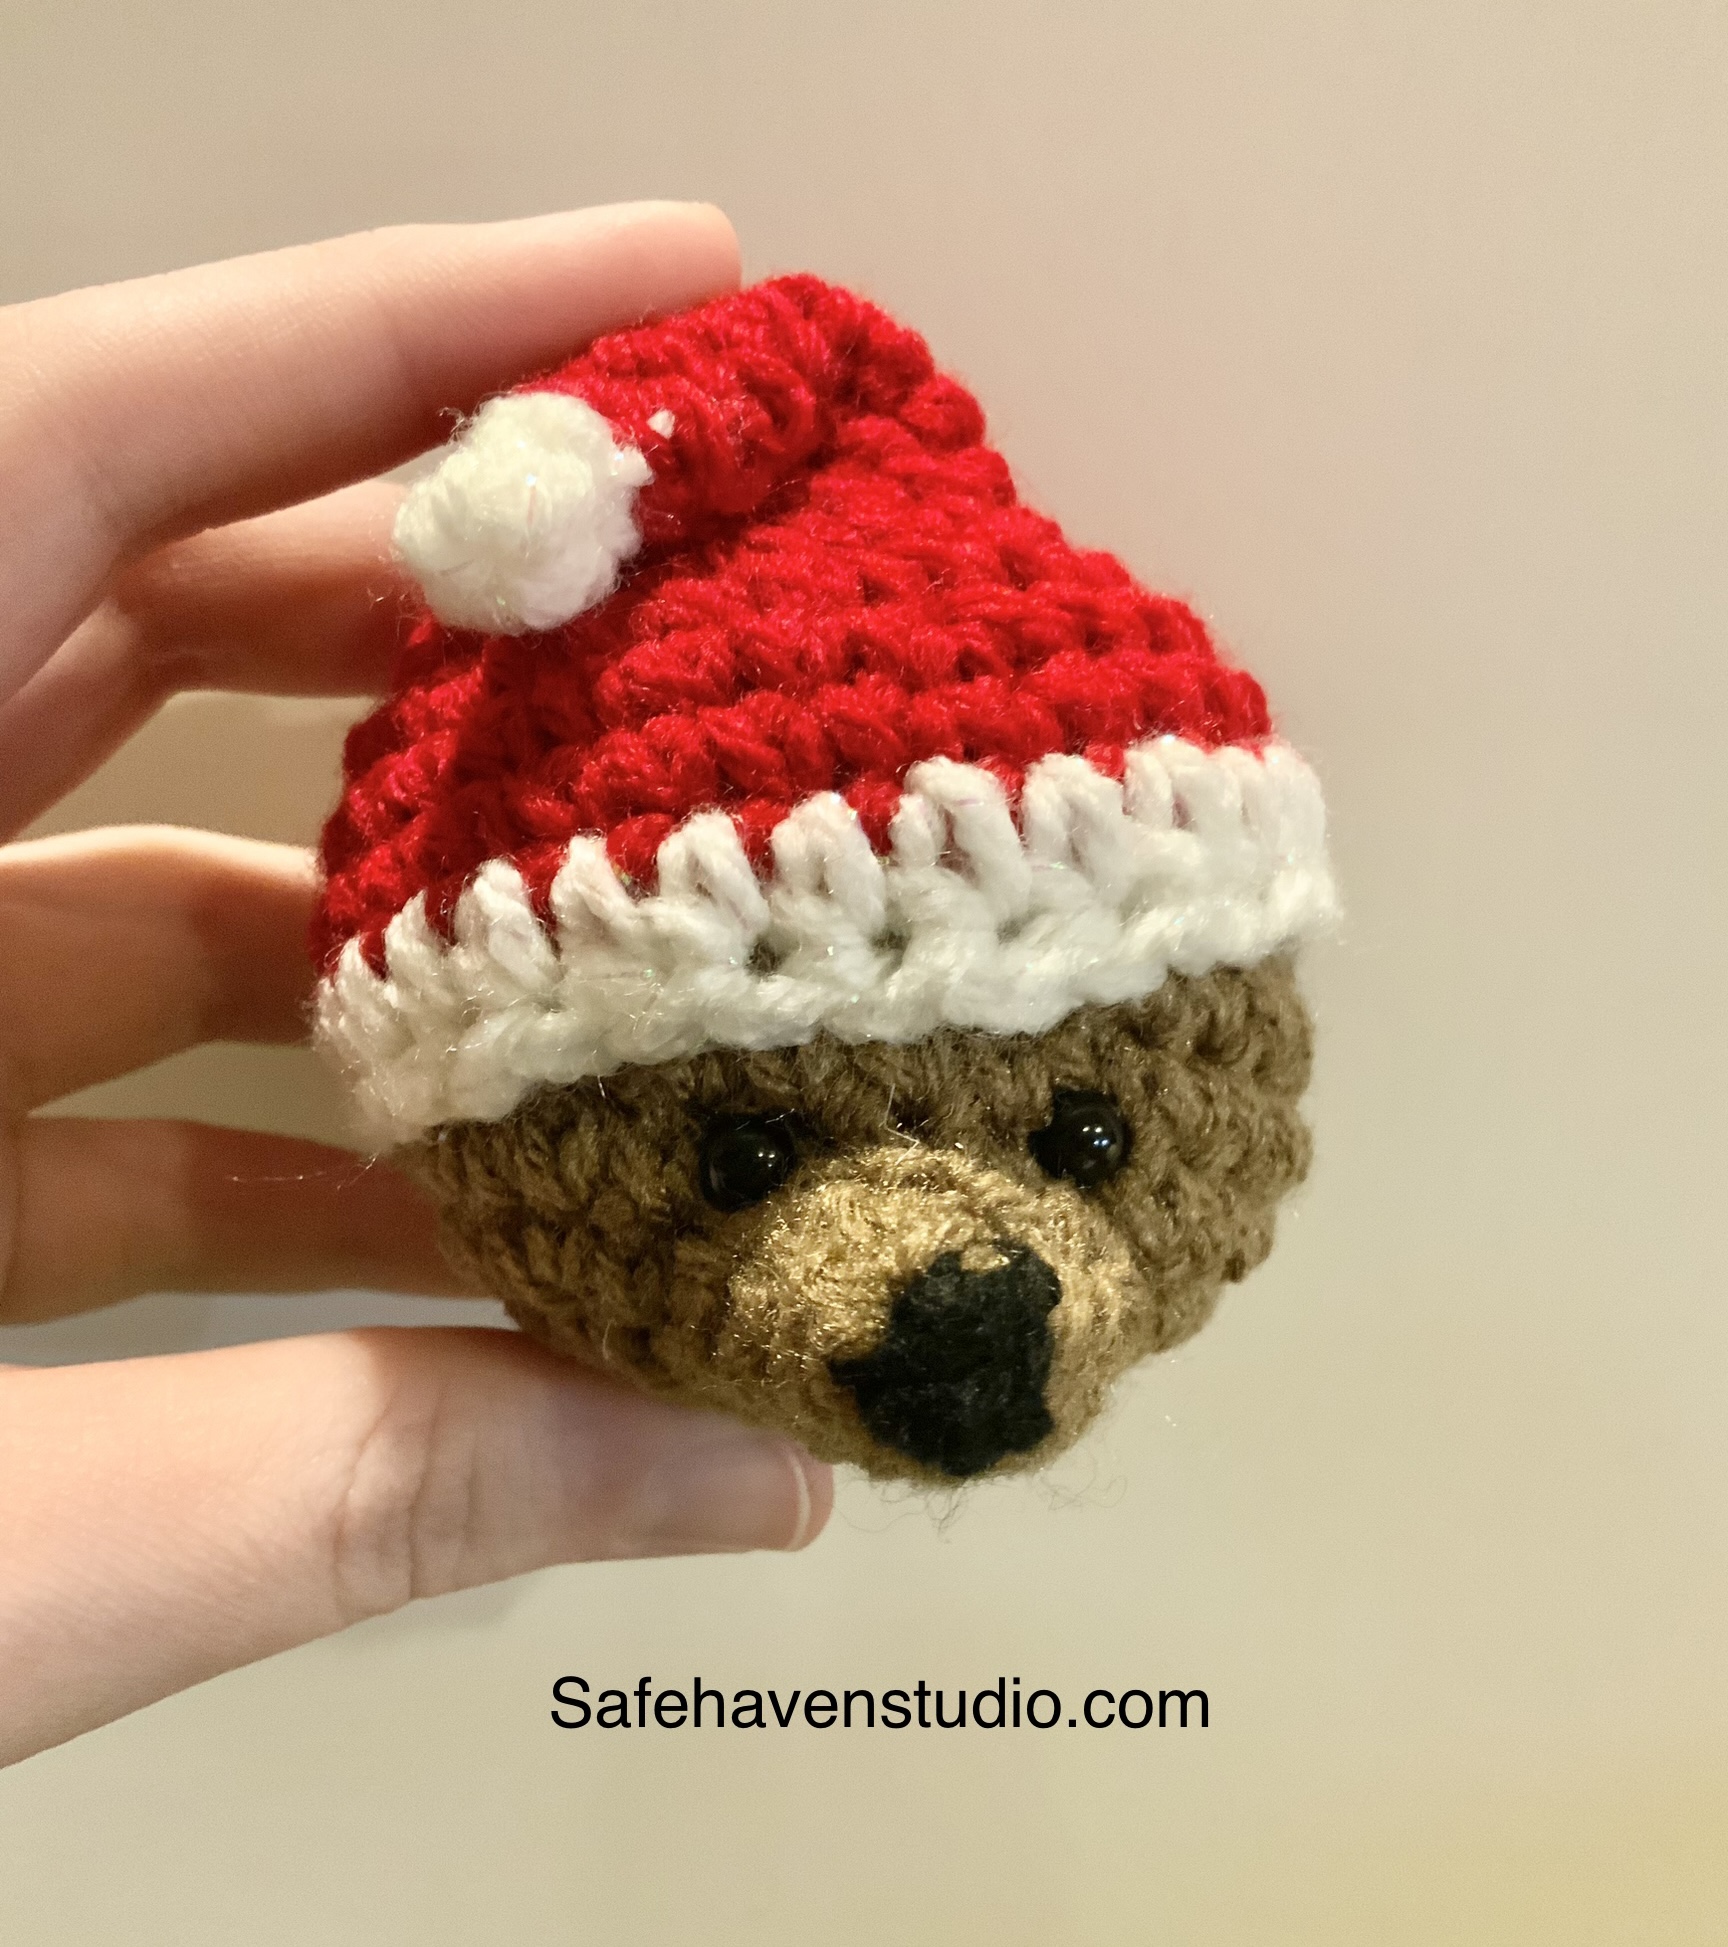
This Santa Bear ornament is fairly quick to make and lots of fun too. It’s pretty simple, using basic crochet techniques that aren’t too hard. The only thing that might be an issue for beginners is the magic ring, but there are a lot of tutorials on YouTube for how to do it.
Please don’t forget to tag me in pictures of your makes on instagram @safehaven_studio and don’t forget to check out my paid patterns here on my ko-fi or here on my Ravelry. Thanks so much!
Materials Needed
- Worsted weight yarn in Black, Brown, Red, and White
- 6mm Safety Eyes
- 3.75mm (F) Crochet Hook
- Stuffing
- Yarn Needle
- Pins
- Scissors
Crochet Terms (US Terms)
- Ch – Chain
- MR – Magic Ring
- Sc – Single Crochet
- Inc – Single Crochet Increase
- Dec – Single Crochet Decrease
- HDC – Half Double Crochet
- Sl St – Slip Stitch
- St – Stitch
- FO – Fasten Off
Snout – Starting with Black
R1: 3 Sc in MR
Switch to brown at the end of R1.
R2: *Inc* (6) – Make sure to pop the nose out.
R3: 2 Sl St, Sc, 2 Inc, Sc (8)
R4: 2 Sl St, 2 Sc, 2 Inc, 2 Sc (10)
R5: Sl St once and FO.
Leave a tail to sew.
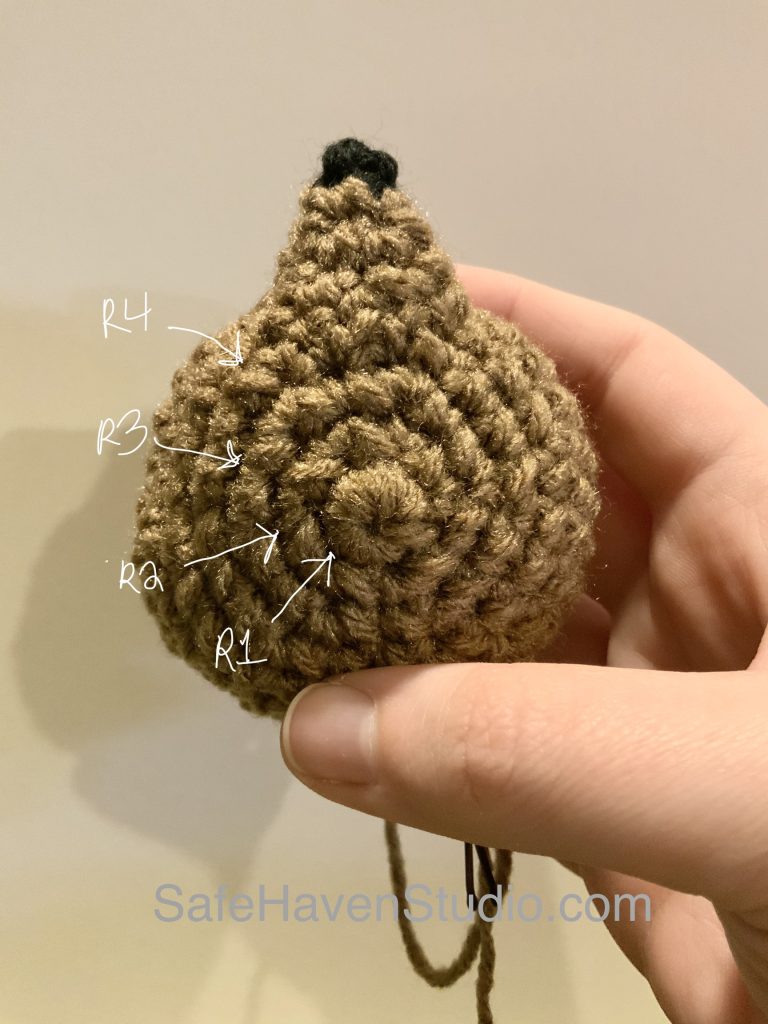
Head – In Brown
R1: 6 Sc in MR (6)
R2: *Inc* (12)
R3: *Sc, Inc* (18)
R4: *2Sc, Inc* (24)
R5: *3Sc, Inc* (30)
R6-9: *Sc* (30)
R10: *3Sc, Dec* (24)
R11: *2Sc, Dec* (18)
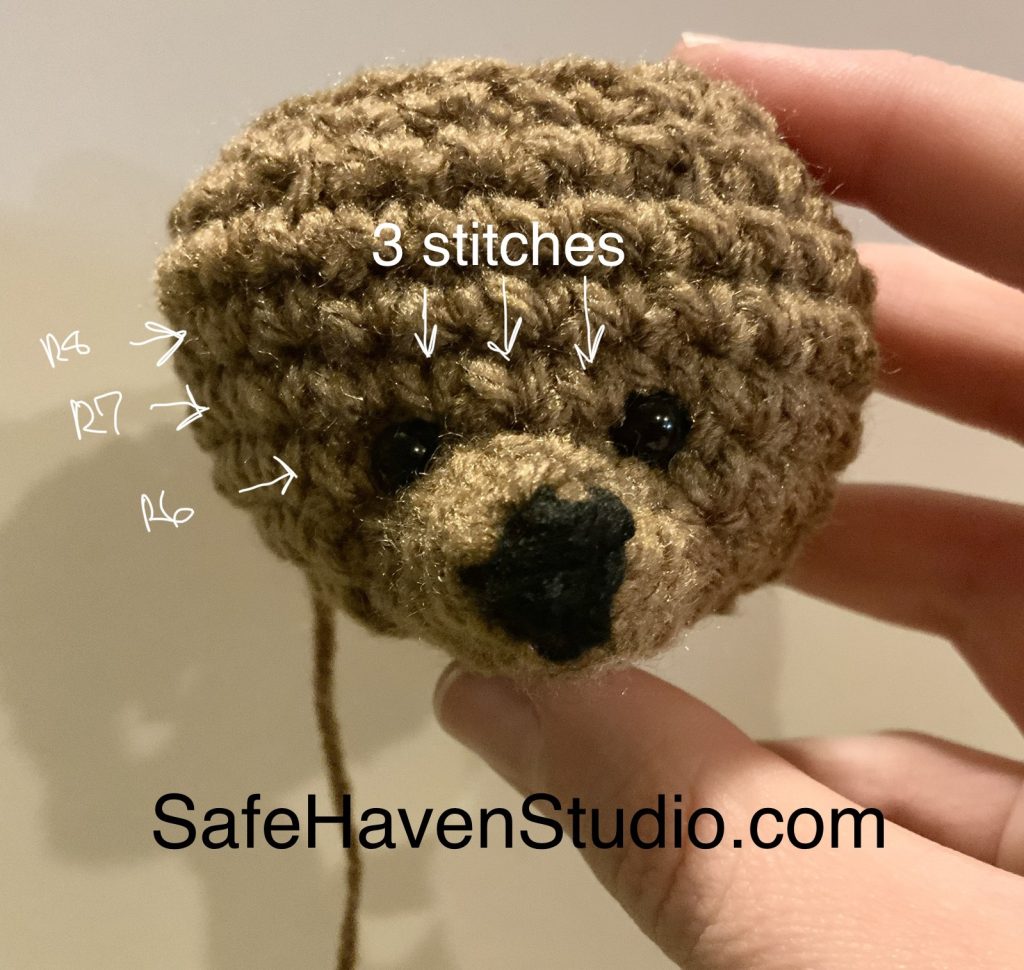
Attach nose between Rows 4-6 of the head. I pin mine before sewing.
Add the 6mm eyes around R6-7 and 3 stitches apart. Take a look at my image for reference.
R12: *1Sc, Dec* (12)
R13: *Dec*
FO and sew closed.
Santa Hat – Starting with Red
R1: 4Sc in MR (4)
R2: *Inc* (8)
R3: *Sc* (8)
R4: *3Sc, Inc* (10)
R5: *4Sc, Inc* (12)
R6: *5Sc, Inc* (14)
R7: *6Sc, Inc* (16)
R8: *7Sc, Inc* (18)
R9: *2Sc, Inc* (24)
R10: *3Sc, Inc* (30)
R11: *14Sc, Inc* (32)
R12: *Sc* (32) – Change to white yarn.
R13: *Hdc* (32)
Sl St once and FO, leaving a tail to sew to head.
Pom for Hat – Using White
R1: Leave a tail at the beginning and work 4Sc in MR (4). Sl st once to first Sc.
FO and leave an ending tail. Using the end tail, weave through the remaining 3 sts and pull tight. Do not weave in yet. This should form a little ball.
Pull both the beginning tail and the end tail of yarn through the tip of the Santa hat. I tie mine three or four times on the inside and cut the excess yarn.
Now the hat is done!
Assembly
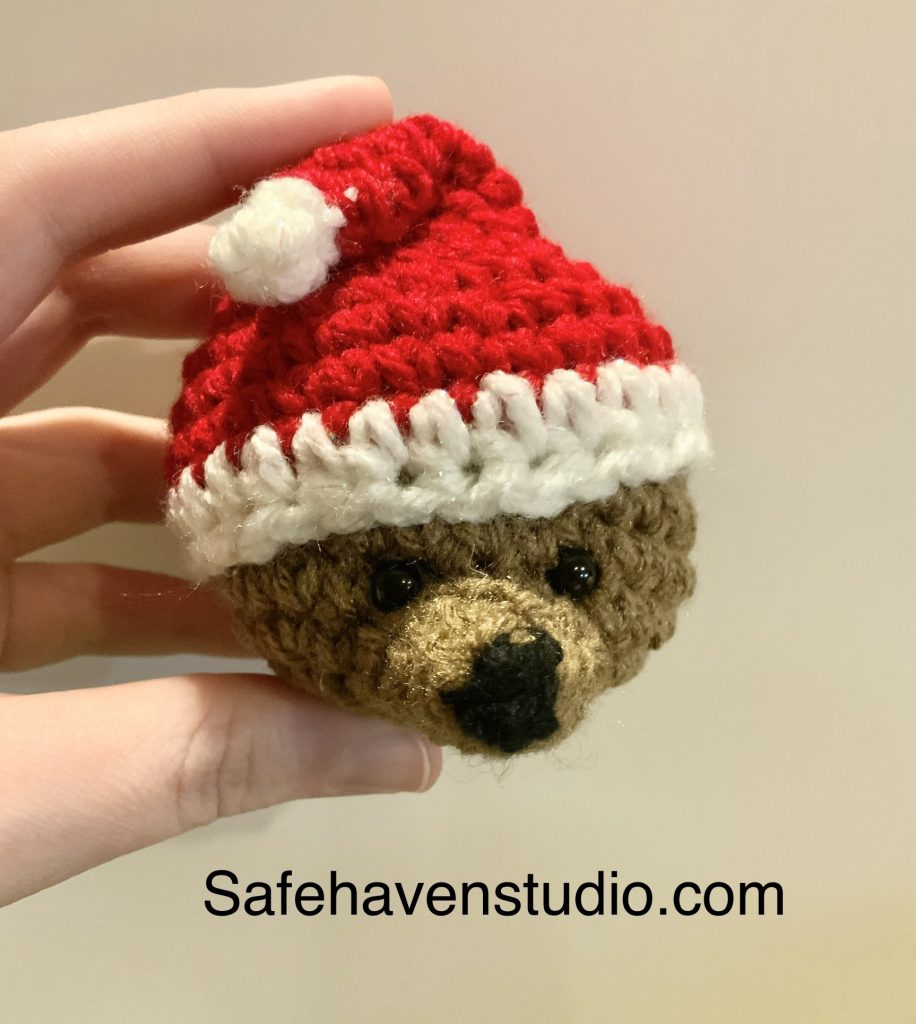
Using red yarn, sew a fold in the hat so the tip is bent down and slightly to the left. Please see my image for reference.
Put the hat on the teddy’s head and pin it at a slight angle. Using the white yarn tail from the hat, sew the hat to the head. Add a ribbon or hook to the hat and you’re done!
Thank you so much for your interest in my pattern! I’d love to see your creations on instagram so please tag me @safehaven_studio
I have a Ravelry shop here and I also have a new ko-fi shop here where I’m selling all my paid patterns. It has links to all my socials.
This is an original pattern by Shelby of SafeHavenStudio. You cannot claim this pattern or images as your own, distribute, or sell this pattern or images. If you want to share, you may link to this pattern but please do not reprint on your site. You may sell items made from this pattern in small quantities but please give credit to me (Shelby at SafeHavenStudio) for the pattern. Thank you for respecting the boundaries and products of designers.